Create a X/Twitter application
Subscribe to the Developer Platform (opens in a new tab). See this tutorial (opens in a new tab) for a better overview.
Create a new project and a sub application, with access to API v2 and OAuth. Read here (opens in a new tab) for more details.
If you go for the Free plan, remember that you (and all other enabled users in Reposter.app) can only publish 50 requests / 24 hours.
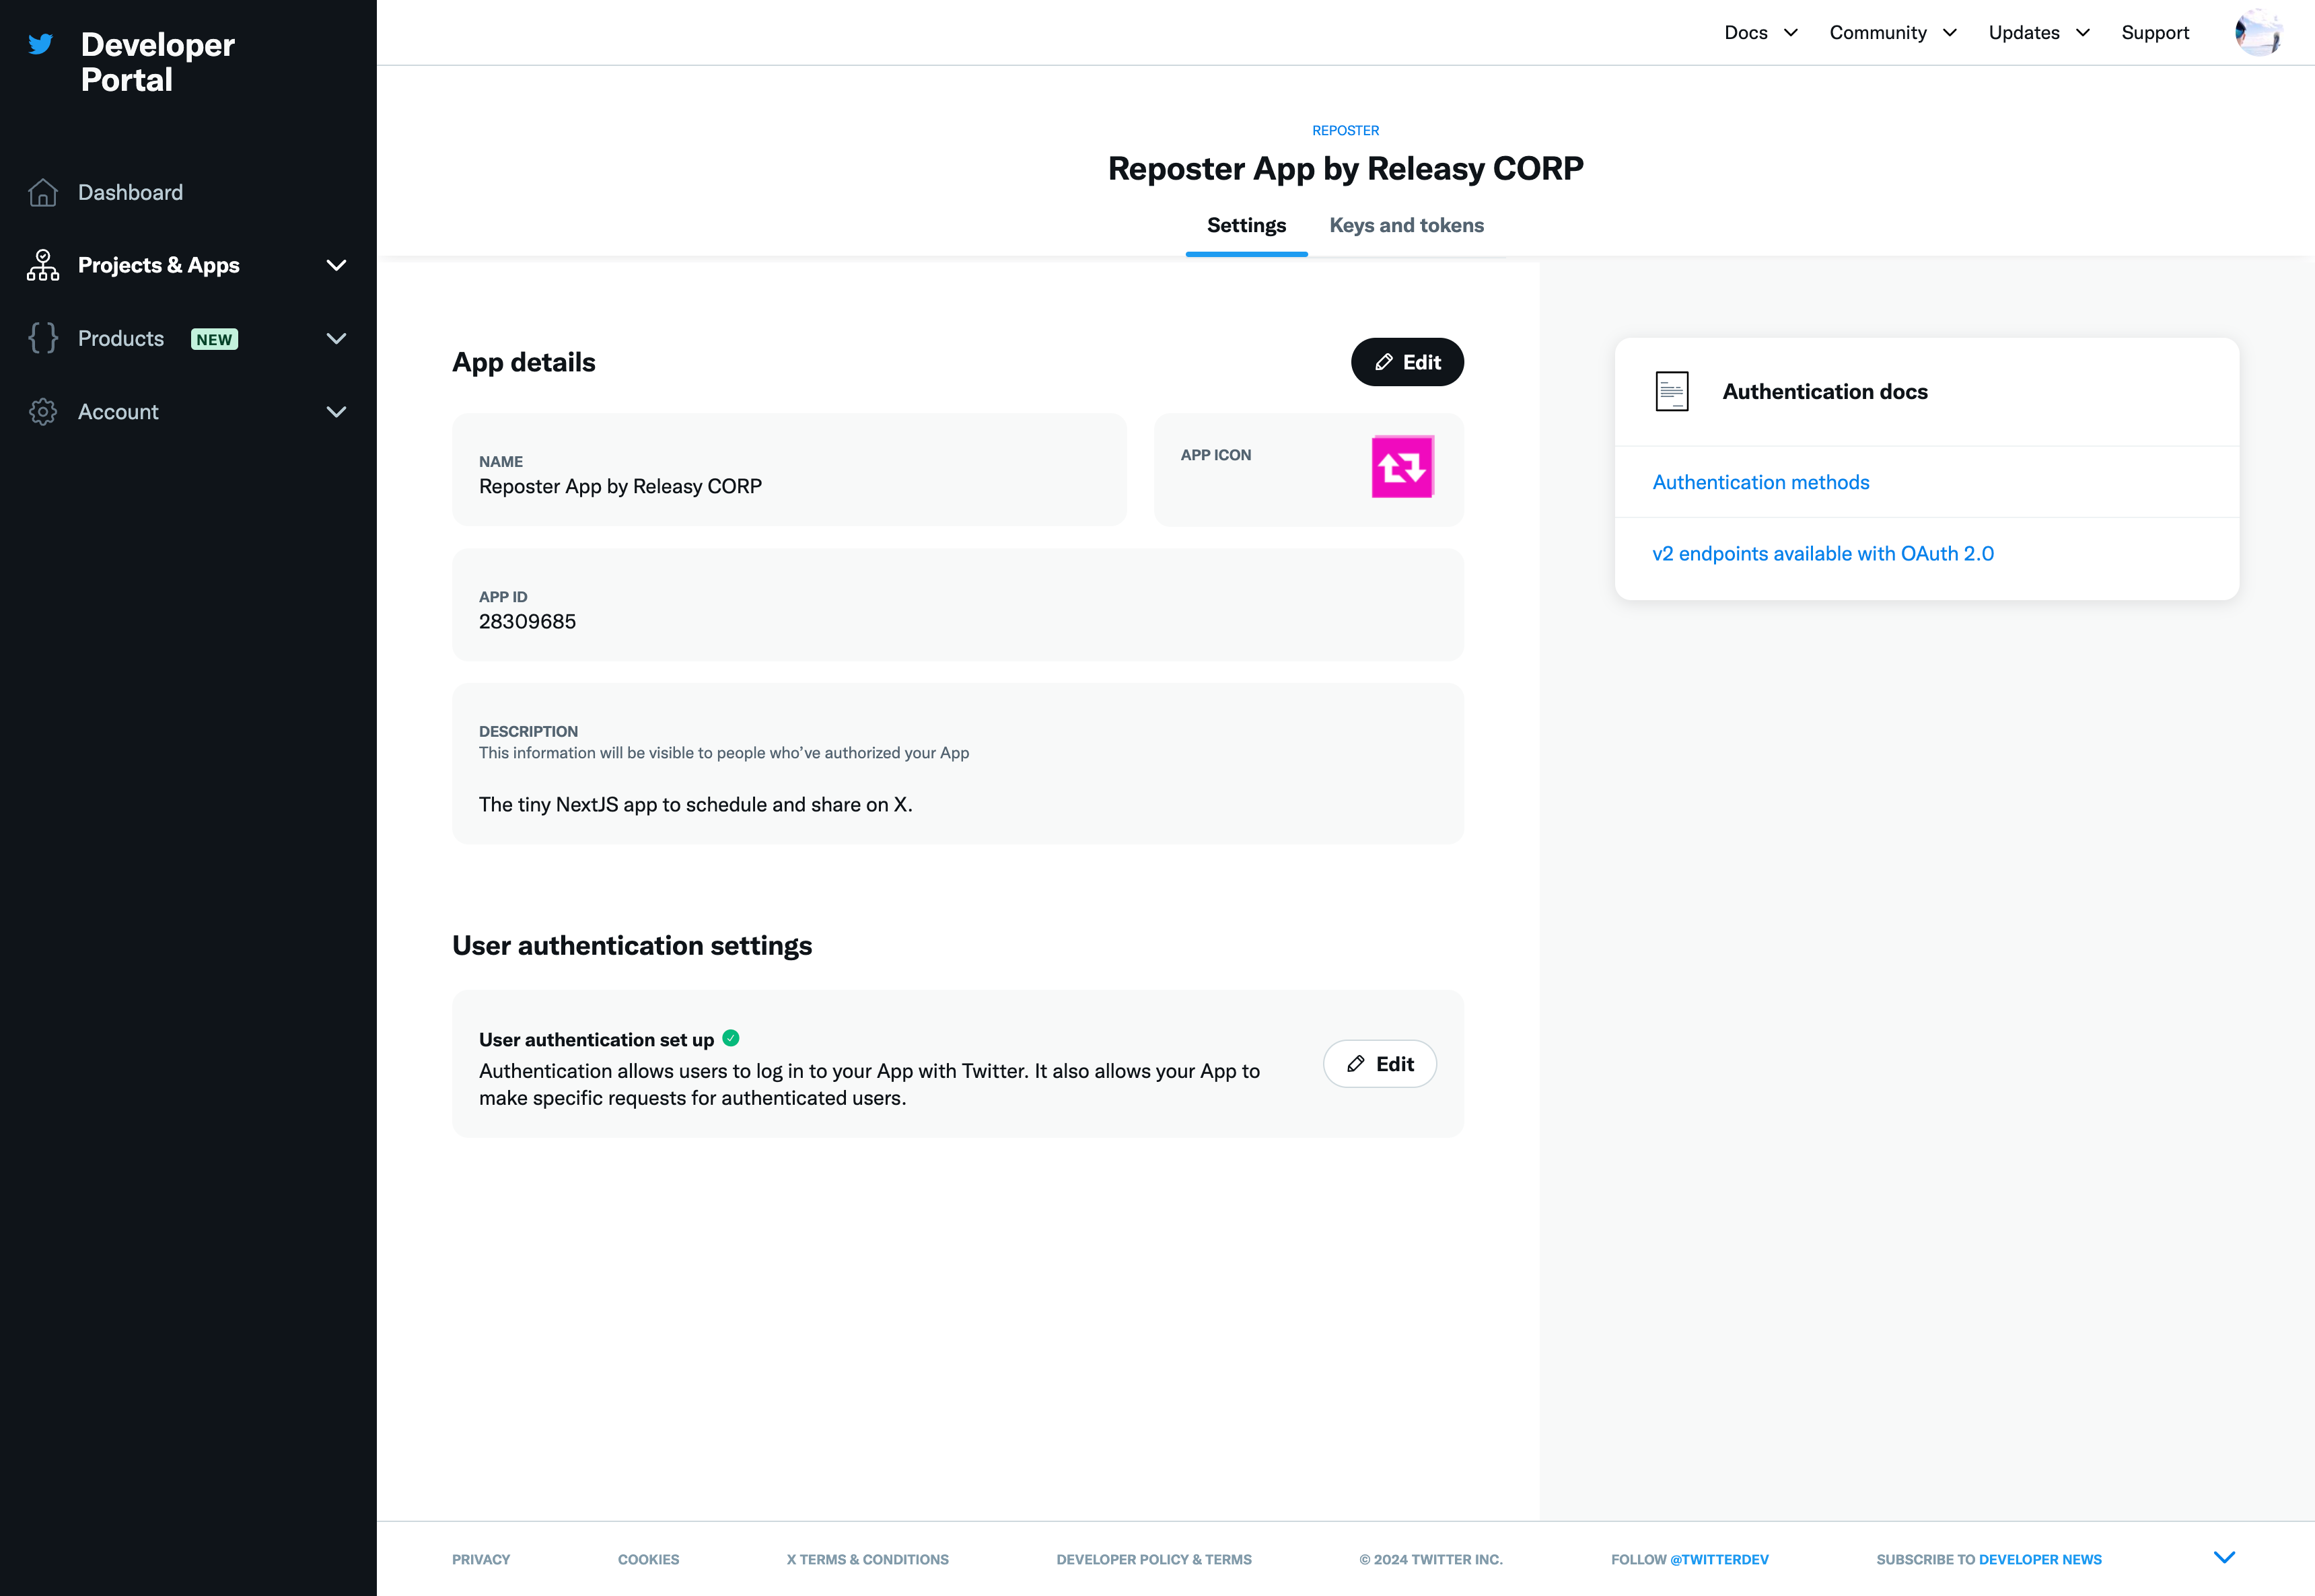
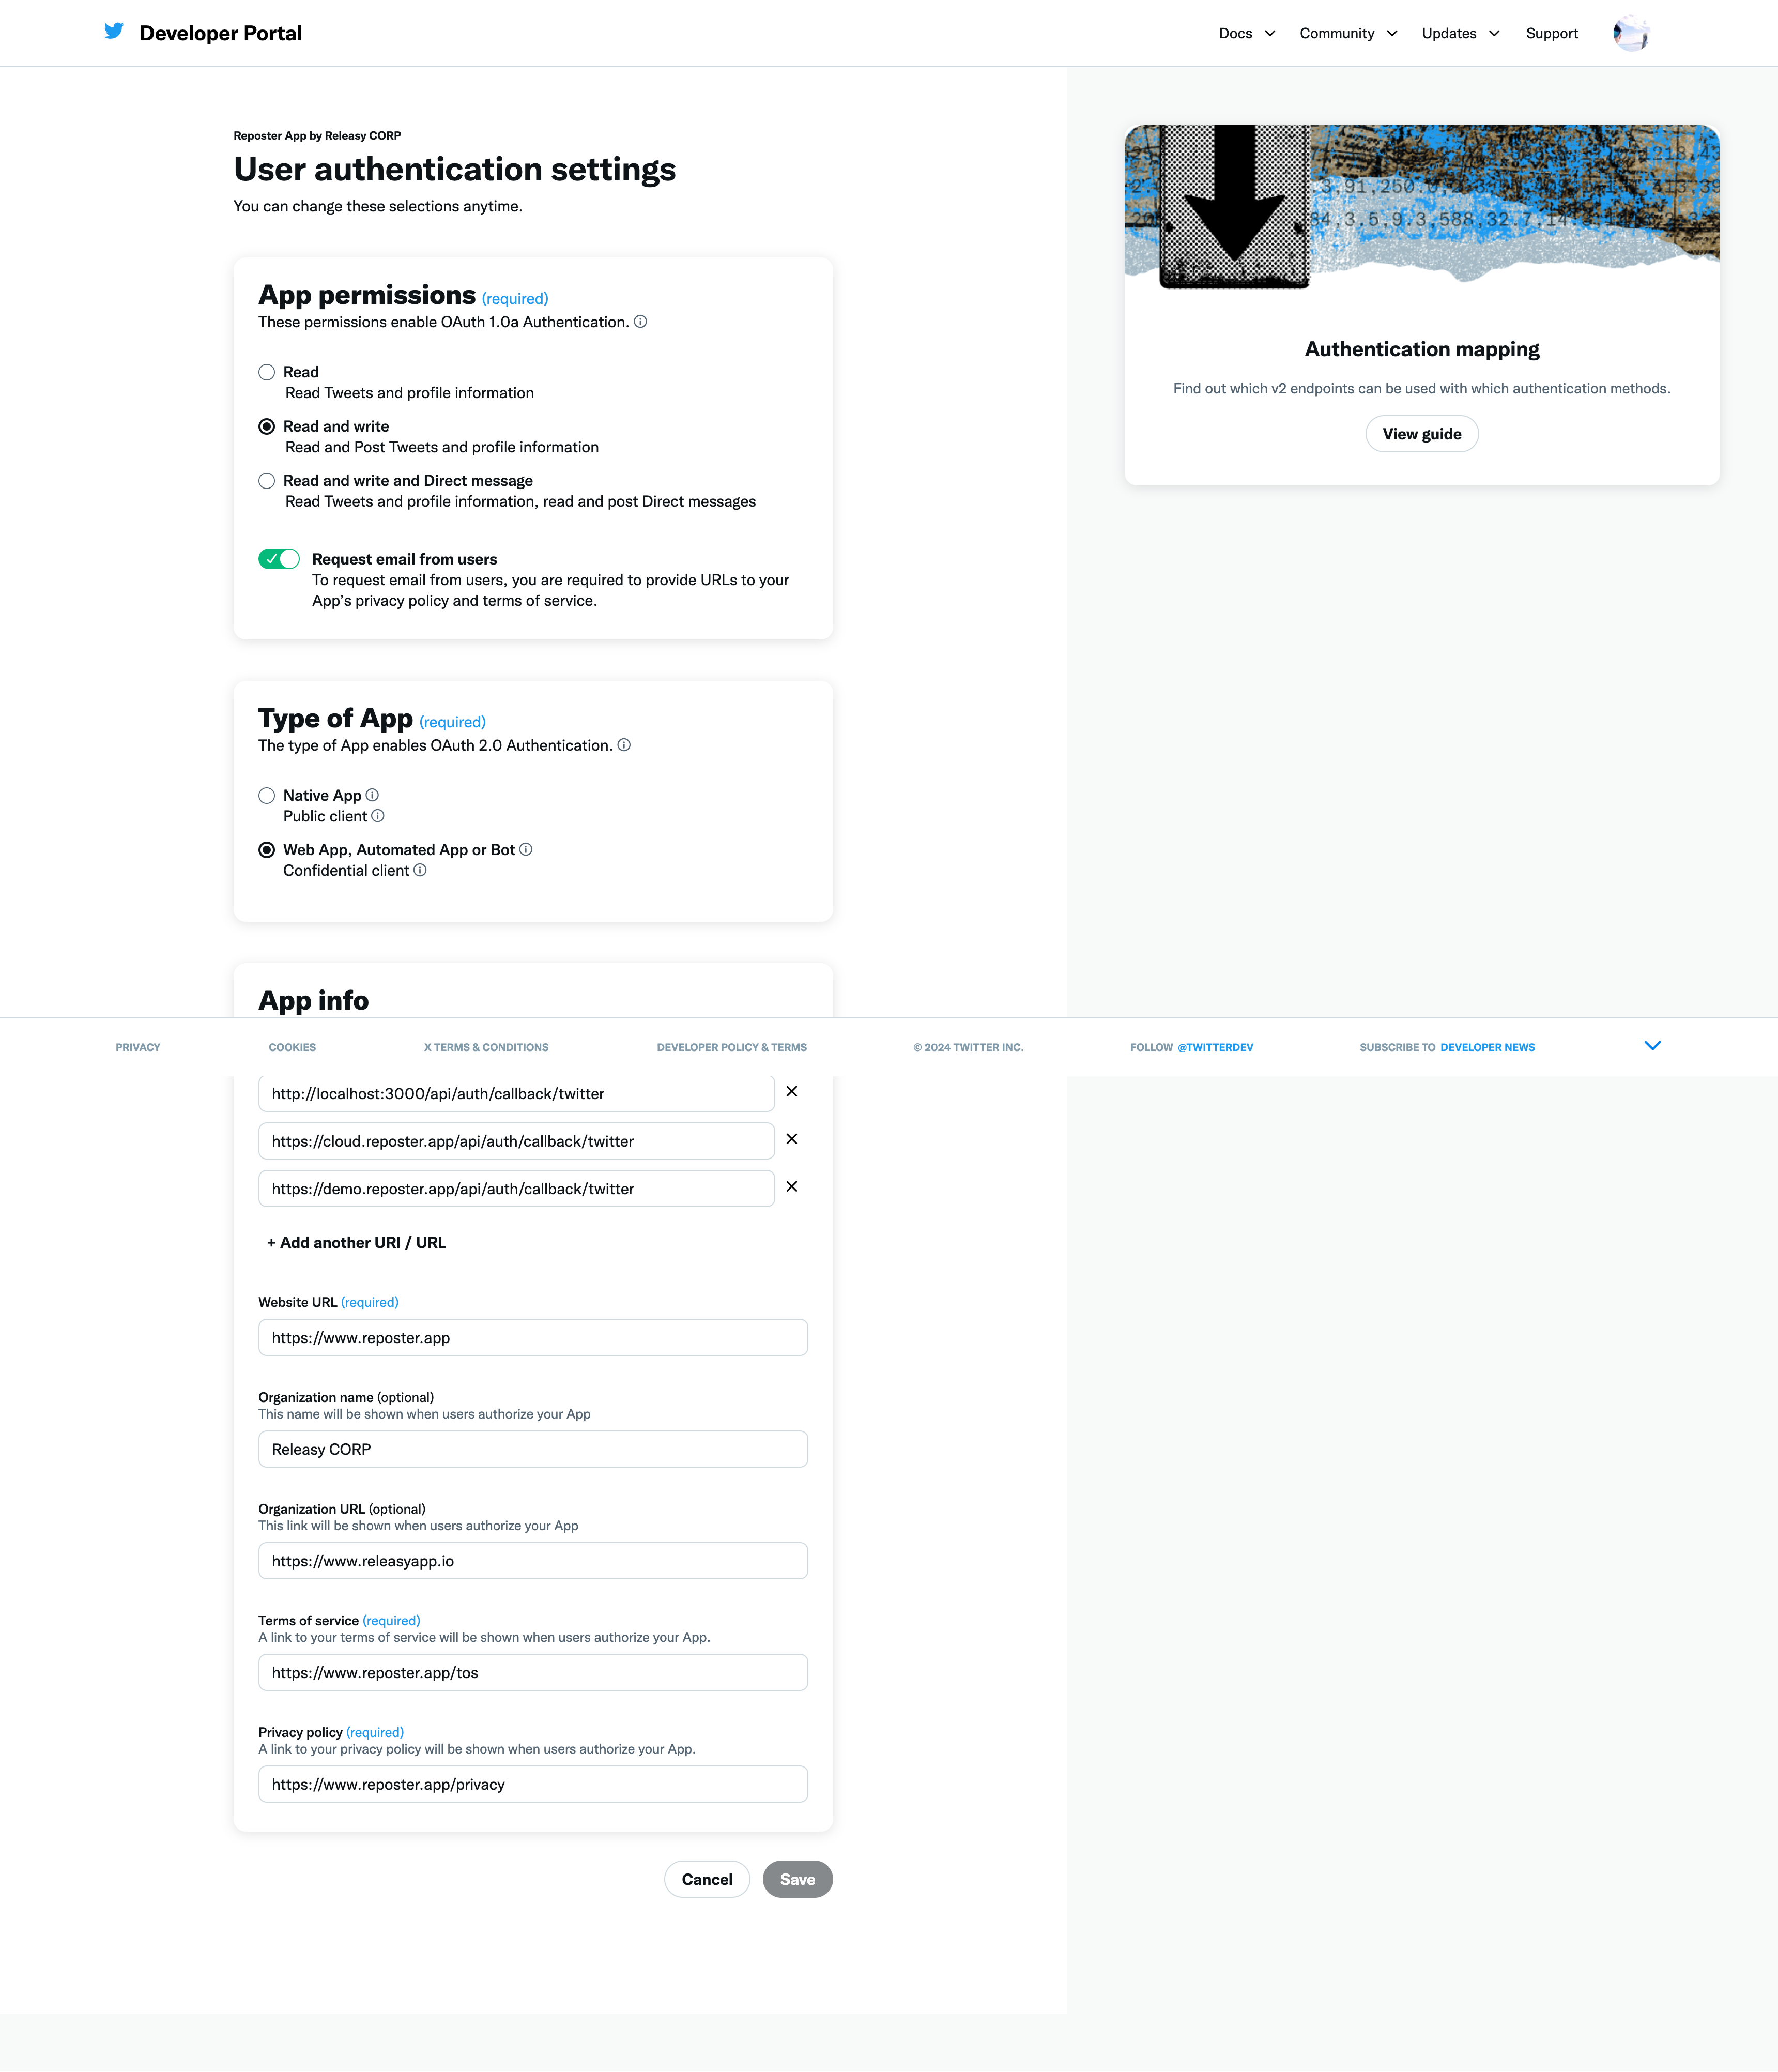
Once created the application, go to the "Settings" -> "User authentication settings" and edit the "User authentication set up":

- App permissions
- Read and write
- Type of App
- Web App, Automated App or Bot
- App info:
- Callback URI / Redirect URL:
- http://localhost:3000/api/auth/callback/twitter (opens in a new tab) (for local development)
- https://vercel-app-url/api/auth/callback/twitter (once deployed)
- Website URL
- add you main site url
- Terms of service
- add you main site tos
- Privacy policy
- add you main site privacy policy
- Callback URI / Redirect URL:

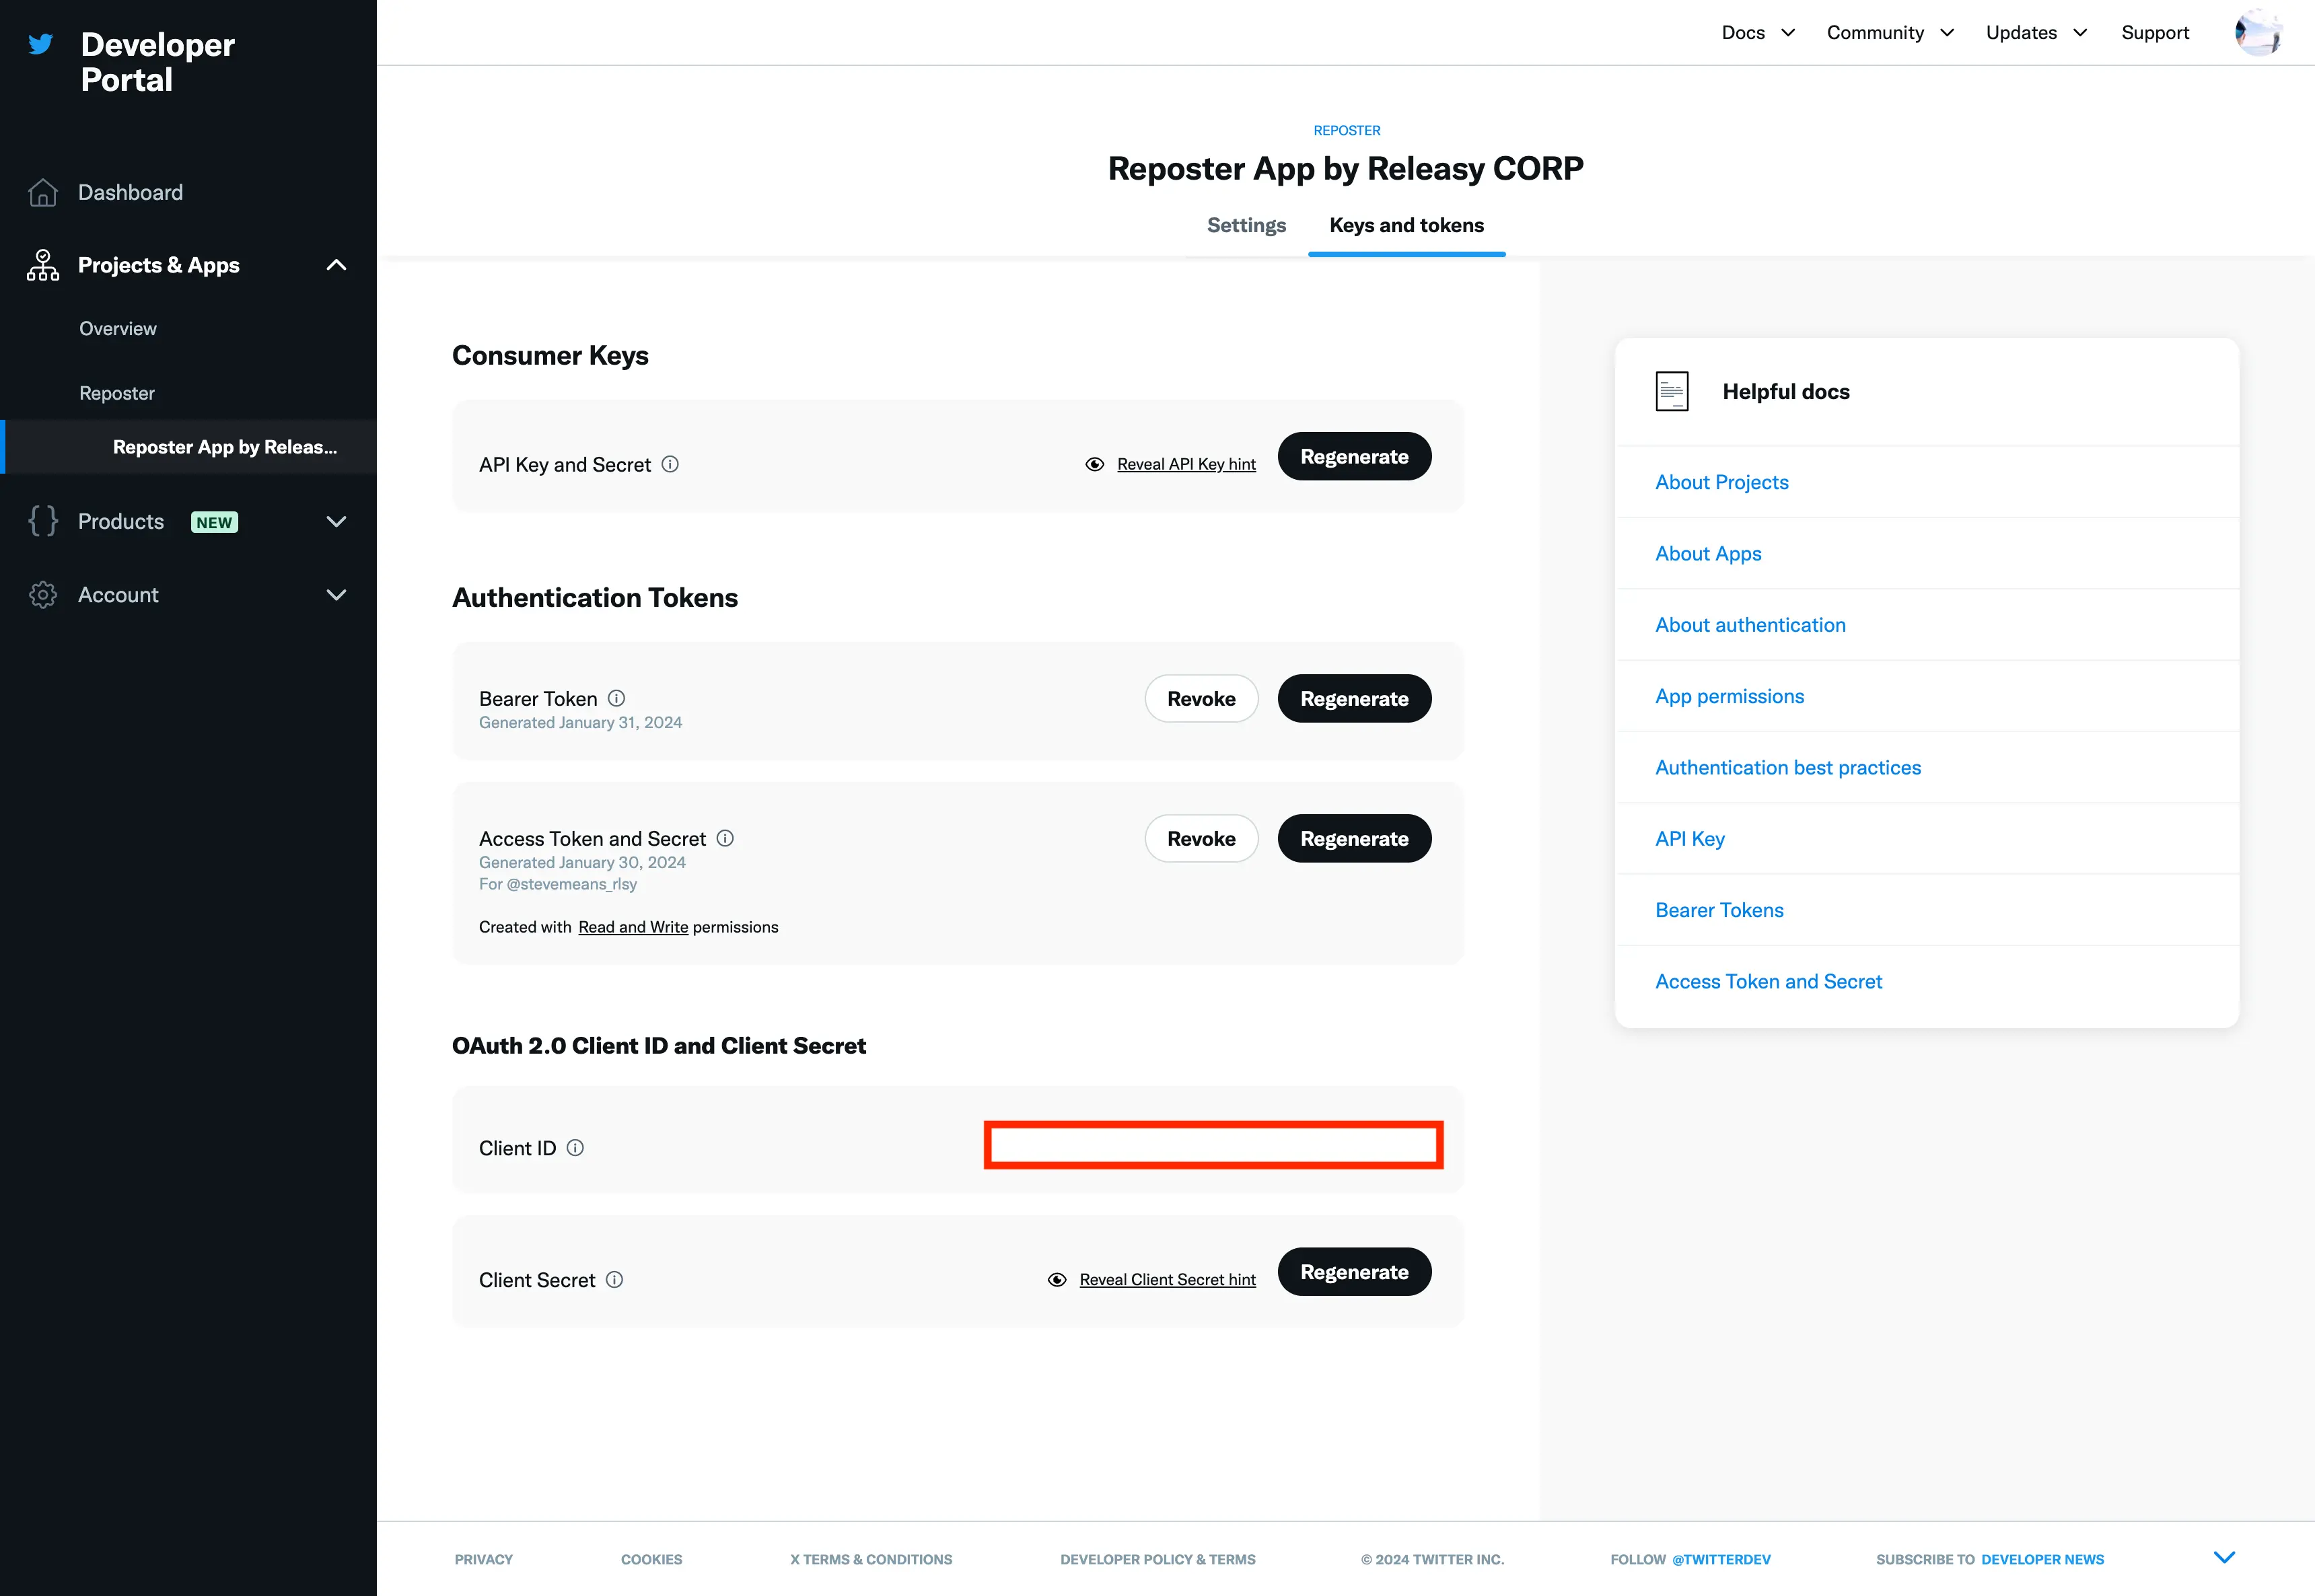
Once created the application, go to the "Keys and tokens" -> "OAuth 2.0 Client ID and Client Secret" section and get:
Client IDand fill theX_OAUTH2_CLIENT_IDvariable in the.envfileClient Secretand fill theX_OAUTH2_CLIENT_SECRETvariable in the.envfile

At this point you have setup all necessary configuration to publish textual only posts.
Add support for image upload (Optional)
To enable image upload, you need to get also some additional keys.
From the Developer Portal (opens in a new tab), open your application and go to the "Keys and tokens" section.
From "Consumer Keys" section and get:
Keyand fill theX_CONSUMER_KEYvariable in the.envfileSecretand fill theX_CONSUMER_SECRETvariable in the.envfile
From "Authentication Tokens" -> "Access Token and Secret" section and get:
Keyand fill theX_ACCESS_TOKENvariable in the.envfileSecretand fill theX_ACCESS_SECRETvariable in the.envfile